Making Realistic Miniature Turkey Slices from Polymer Clay
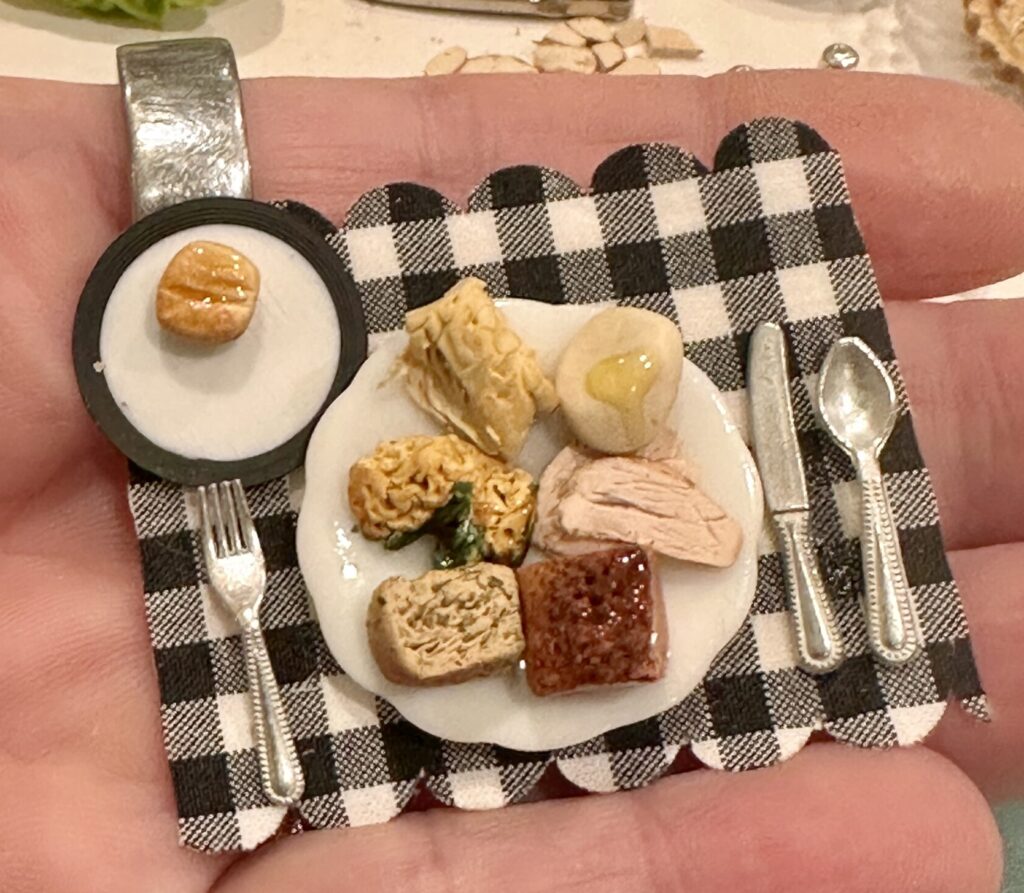
Sometimes the secret to realistic miniature food is hiding right in your kitchen spice rack!
Thanksgiving dinner just wouldn’t be complete without a few slices of roasted turkey! When I started making miniature turkey slices for my dollhouse Thanksgiving dinner, I wanted them to look like the real thing — right down to the delicate fibers of the meat and the seasoned, golden-brown crust.
The trick wasn’t an expensive mold or a specialized tool. It was a combination of carefully chosen clay colors, a few everyday texturing materials, and a little creative experimentation.
Here’s how I made mine, along with a few ideas you can try to make your own.
Gather Your Materials
- Polymer clay in colors suitable for mixing a cooked turkey shade
- Chalk pastels in warm roasted-brown tones
- Finely chopped dried kitchen herbs
- A sharp craft knife
- A needle tool
- Sandpaper
- Crumpled aluminum foil
- An old toothbrush
- A tiny amount of translucent liquid polymer clay, if needed
- A baking tile or other polymer-clay-safe baking surface
Step 1: Mix Your Turkey Color
Before mixing my polymer clay, I found a reference photograph of cooked turkey breast.
Real turkey isn’t pure white or beige. It has subtle warm tones, a fibrous interior, and a darker roasted exterior. I mixed my clay until I had a base color that closely resembled the meat in my photograph.
There’s no magic color formula here. The important part is learning to look carefully at what you’re trying to recreate.
Step 2: Shape the Turkey Breast
After mixing the clay, I shaped it into a small log resembling a turkey breast.
Think about the size and shape of a real turkey breast as you form your clay log. Remember, you’ll be cutting slices from this shape, so the width and thickness of your log will determine how large your finished turkey slices will be.
Step 3: Add Surface Texture
I used sandpaper, crumpled aluminum foil, and an old toothbrush to introduce different surface textures.
Experiment with the pressure and direction of the marks until the outside looks more like food and less like smooth clay. You don’t need to use every tool everywhere. A little variation makes the surface more convincing.
Step 4: Create the Roasted Crust
I used chalk pastels to build up the warm, golden-brown roasted color around the outside of the log.
Keep your reference photograph handy. Looking closely at how real turkey browns can help you decide where to add more or less color.
Step 5: Add the Herbs and Seasoning
For the seasoning, I raided my kitchen spice rack! I selected some dried herbs and chopped them even finer with a craft knife to get pieces small enough for miniature food.
Depending on the condition of your clay, the herbs may stick simply by pressing them into the surface.
Mine needed a little help, so I applied a tiny amount of translucent liquid polymer clay. Just enough to hold the herbs in place — not enough to make the surface shiny.
You could also experiment with a very thin layer of compatible acrylic paint as an adhesive, allowing it to dry completely before cutting and baking.
💡GoAlongs Tip: Let the Materials Guide You
Warm, pliable clay may hold the herbs beautifully on its own. Clay covered with a heavier layer of pastel might not. Try a small area first and adjust your approach.
The goal isn’t to follow one exact formula. It’s to find a technique that creates the effect you’re looking for.
Step 6: Cut Your Turkey Slices
With the roasted exterior finished, I used a sharp craft knife to cut thin slices from the log.
Because the crust and seasonings were applied before slicing, each piece already had its own little strip of roasted exterior.
Allow the edges and shapes to be slightly irregular. Real carved turkey isn’t perfectly uniform!
Step 7: Create Realistic Meat Fibers
This is where the turkey really began to come to life!
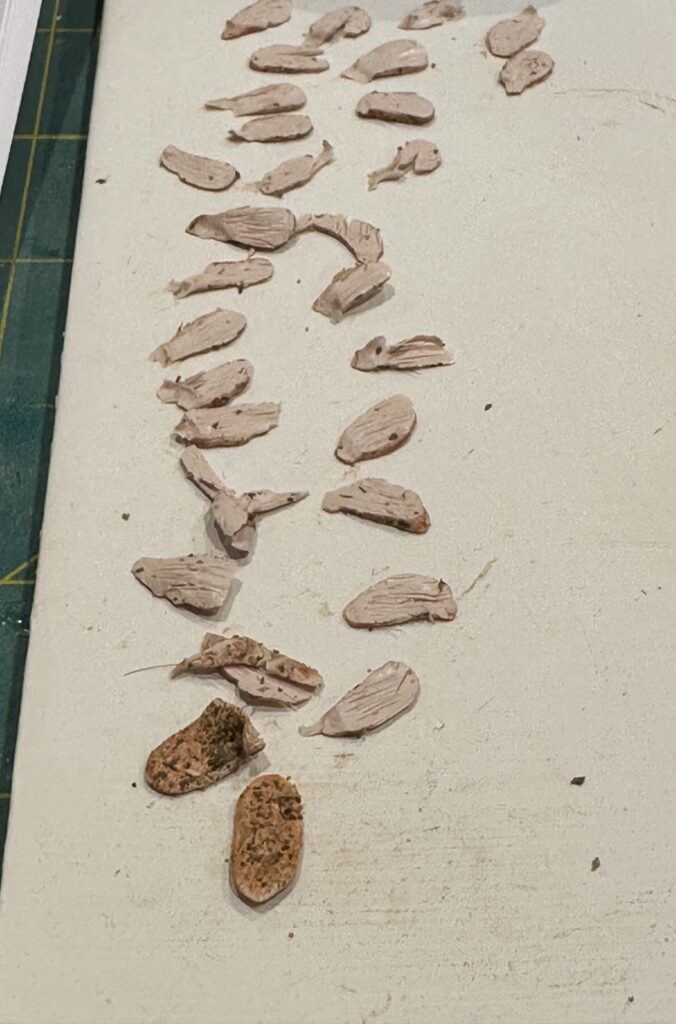
Using a needle tool, I gently pulled and disturbed the edges of the slices to create the slightly ragged, fibrous appearance of real turkey meat. I also used my craft knife to make small cuts and change the shapes of individual slices, adding irregularities that made them look more natural.
The goal wasn’t to create perfectly shaped, identical slices. Think about what happens when you carve a real turkey — some pieces are thicker, some have uneven edges, and others have little tears or notches where the meat separates.
Finally, I added fine lines across the cut surfaces with my needle tool to suggest the natural grain and fibers of the meat. Varying the direction, length, and depth of these marks helped keep the slices from looking too uniform.
Step 8: Bake Your Turkey Slices
Once I was happy with the slices, I arranged them on a baking tile and baked them according to the polymer clay manufacturer’s instructions.
Make sure any added materials are compatible with your clay’s curing temperature, and keep polymer clay tools and baking surfaces separate from food preparation equipment.
What Would I Try Differently?
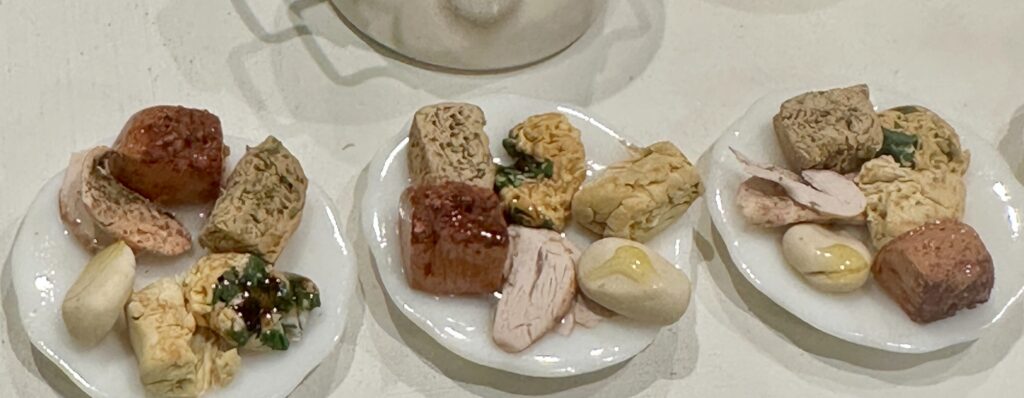
Looking back at these slices, I’m pleased with how the texture turned out. The combination of the needle tool and irregular edges really helps suggest the fibers of cooked turkey.
If I made another batch, I might try adding a very subtle color variation near the outer edges of the meat. Just enough to create a little more depth without losing the natural appearance.
That’s part of the fun of making miniatures. Each project teaches you something you can experiment with the next time.
A Little Creativity Goes a Long Way
You don’t need a huge collection of specialty tools to create convincing miniature food. Sometimes a toothbrush, a bit of sandpaper, a needle, and a few herbs from the kitchen are exactly what you need.
Study the real thing, experiment with a few techniques, and don’t be afraid to adjust your process as you work.
That’s what GoAlongs is all about — taking an idea and making it your own!
Part of our Miniature Thanksgiving Dinner series. Explore more projects and techniques as we put together a tiny holiday feast.