My Home Art Studio – Where Do You Create?
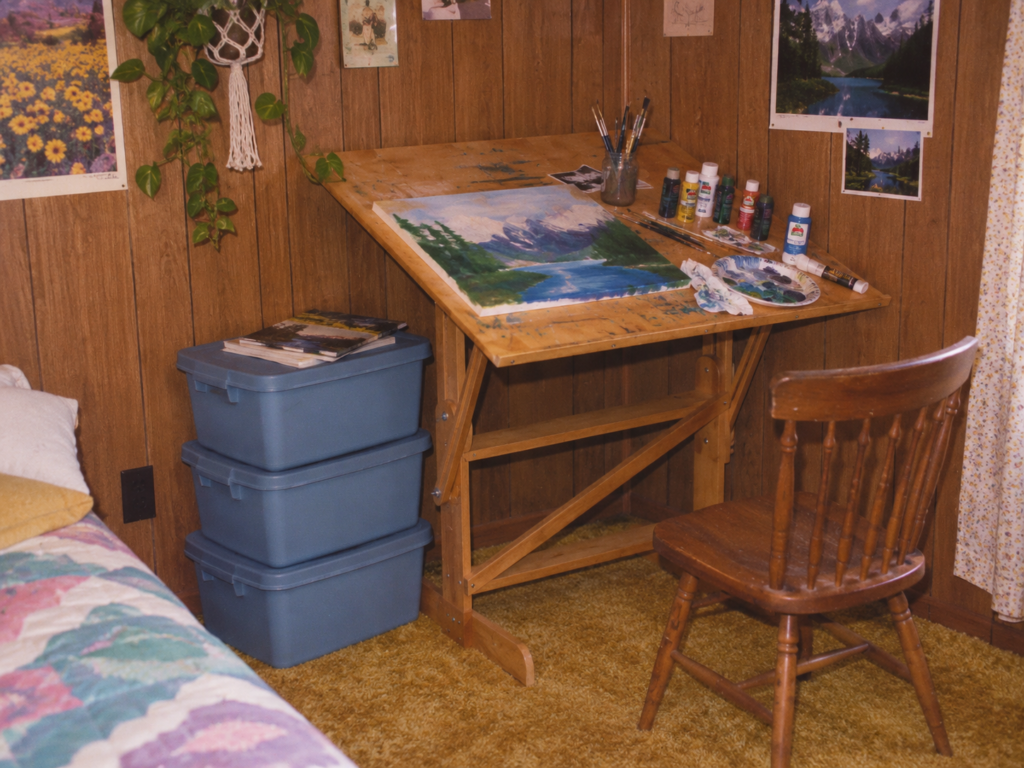
My first real creative workspace after college was a corner of my bedroom in an apartment I was renting. The apartment was in a historic home that had been divided into smaller apartments, and one of its wonderful features was an unusually large bedroom. That gave me just enough room to set up a drafting table and three Rubbermaid storage containers.
It wasn’t elaborate, but it was mine. I had a place to work, somewhere to keep my supplies, and enough room to explore whatever creative idea caught my attention. Looking back, I realize how little I actually needed to get started.
In 1993, my first husband and I set up an art studio in our home. It sounded wonderful in theory, but between working full-time and being pregnant, I didn’t have much time to enjoy it. The room gradually became more of a storage area than a working studio. Having a dedicated room didn’t automatically mean I had the time or energy to use it!
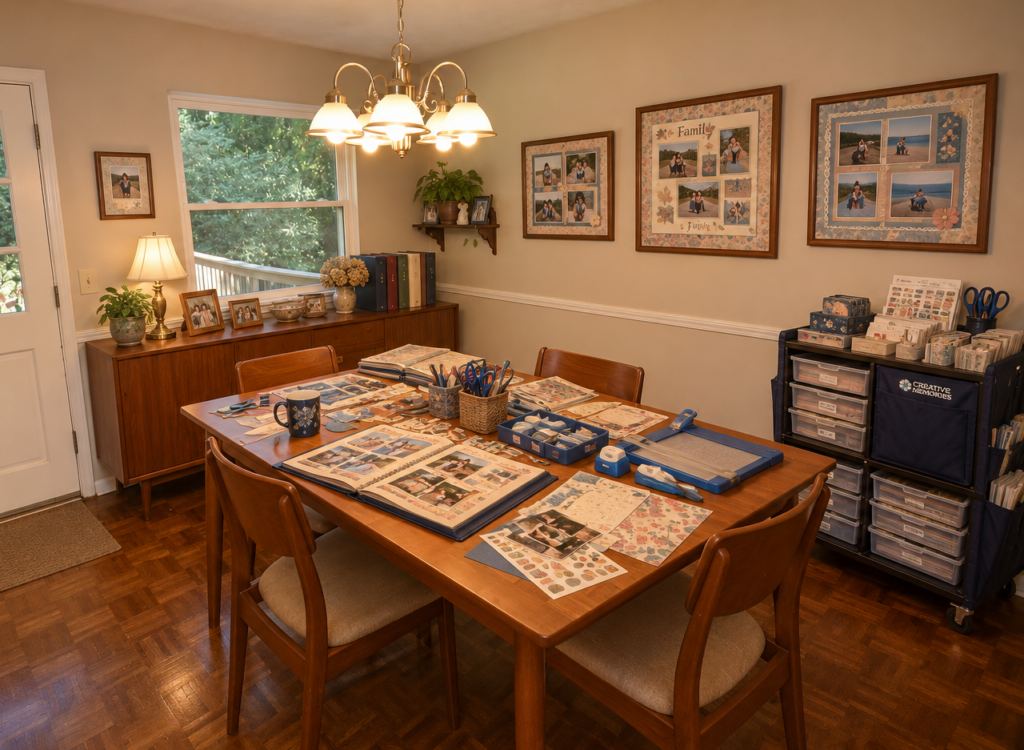
By 1998, I was running my Creative Memories business from our dining room table. I had an ISIS rolling cart and a metal shelf in the garage for storage, but a surprising amount of my actual creative work happened on the floor. I’d spread everything out, work on my projects, and then gather things back together when the space was needed for something else.
Over the years, I’ve worked at kitchen tables, on floors, and in just about any available corner of the house. Supplies were stored in closets, utility rooms, Rubbermaid containers, and wherever else I could find a little extra space.
None of those arrangements was perfect, but they allowed me to keep creating during seasons of life when a dedicated studio simply wasn’t practical.
When a Dedicated Room Became Overwhelming
In 2001, I made another attempt to create a dedicated room for my creative projects. I had a one-year-old and an eight-year-old, and between taking care of my family and managing everyday responsibilities, time was already in short supply.
Money was another challenge. Organizing a creative space can be expensive! Shelving, drawers, cabinets, worktables, and all those wonderful storage containers add up quickly. It’s easy to envision a beautifully organized room, but actually creating one on a limited budget is another story.
And then there’s something that most creative people understand all too well: we tend to keep everything!
A scrap of interesting paper, a little container, leftover fabric, an unusual piece of packaging, or a handful of miscellaneous supplies might look like clutter to someone else. But to a creative person? That’s potential! We can imagine exactly how those things might become part of a future project.
Of course, there’s a downside to seeing creative possibilities everywhere. All those wonderful possibilities need somewhere to live!
My 2001 studio gradually accumulated other household items alongside my growing collection of creative supplies. Instead of becoming the inviting workspace I had imagined, it became a room filled with things that needed sorting, organizing, or putting away.
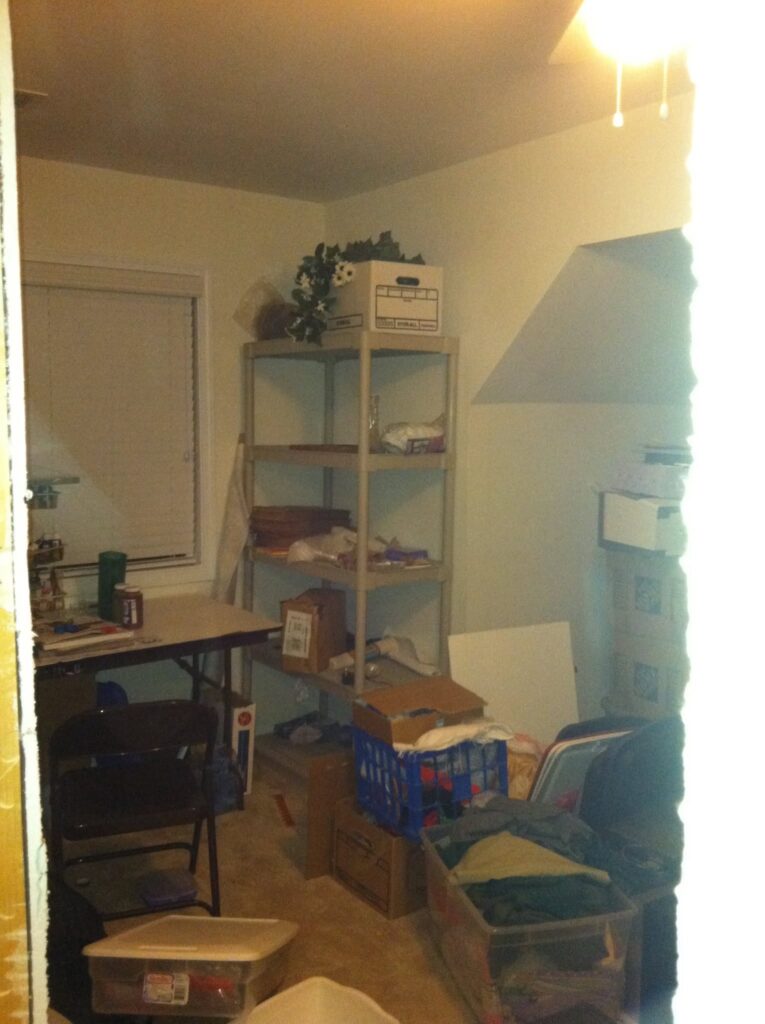
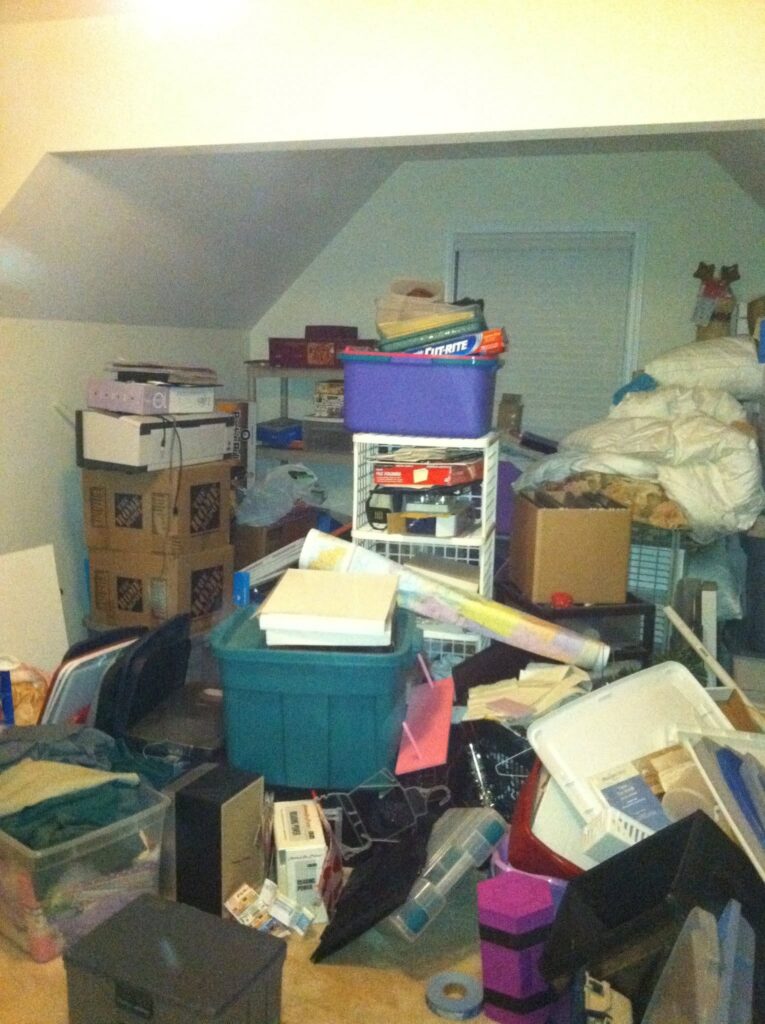
I didn’t have the time, money, or energy to tackle the entire project, and eventually the space became so overwhelming that I didn’t even want to work in it.
Looking back, I realize that my expectations simply didn’t match the reality of my life at the time. I wanted a fully organized creative retreat, but what I really needed was a manageable place to work that fit my family, my schedule, and my budget.
That experience taught me a lesson that has stayed with me: a creative space doesn’t need to be finished or perfectly organized to be useful.
A Dining Room That Became an Art Studio
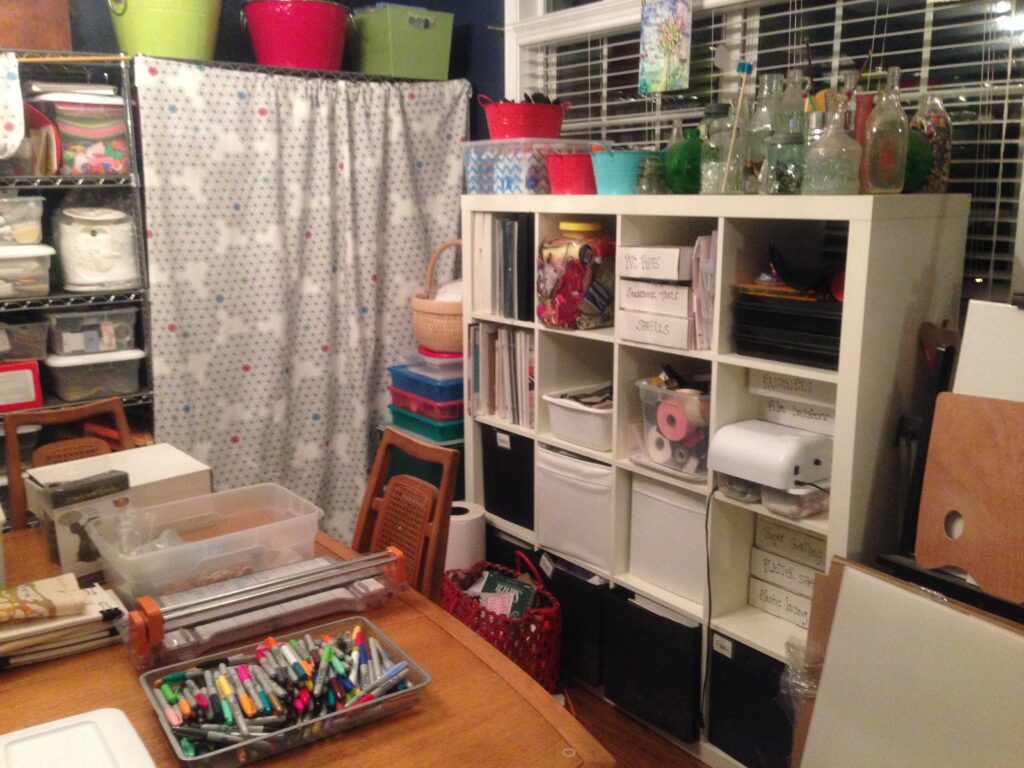
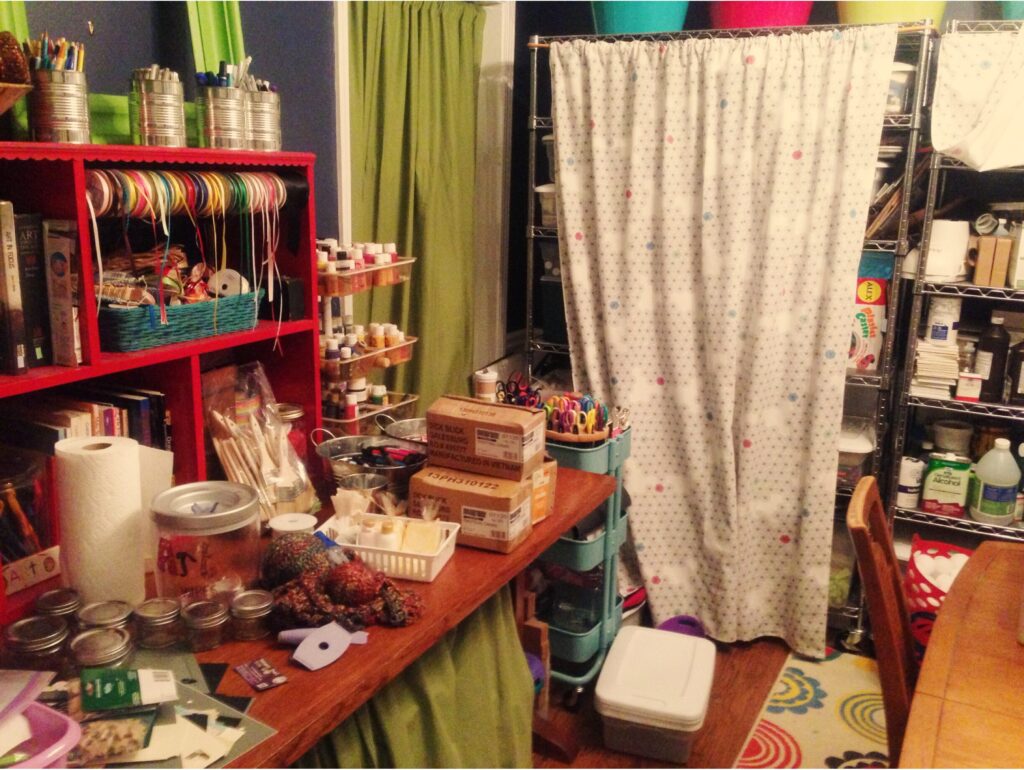
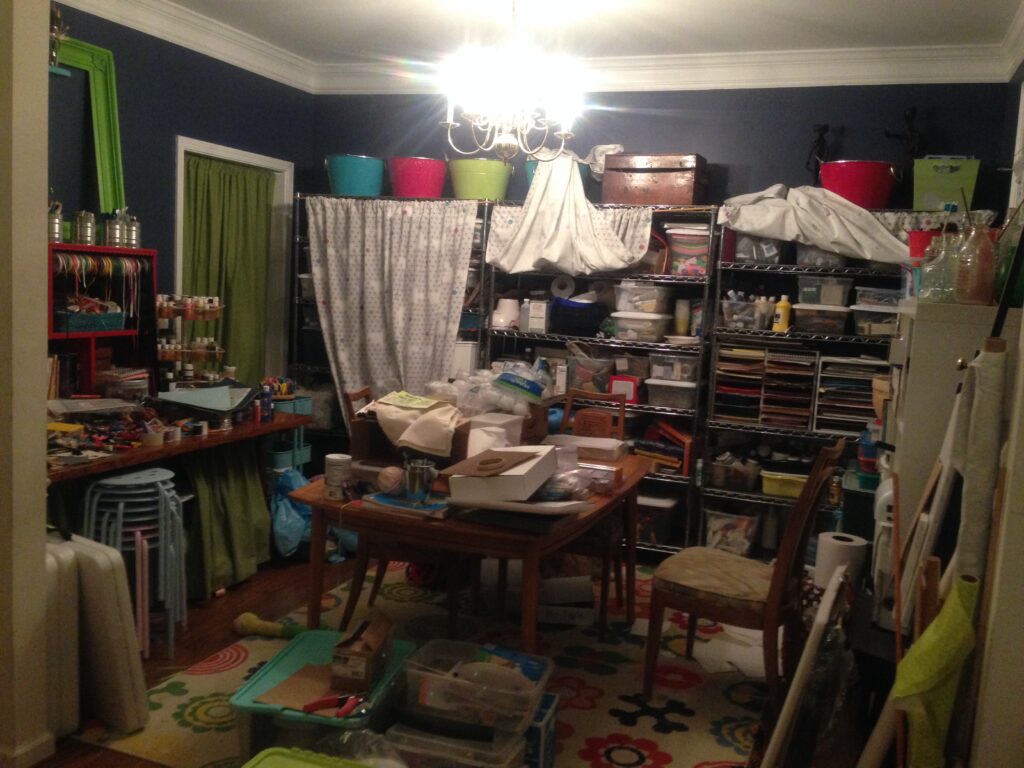
About ten years ago, in our previous house, I finally created a workspace that functioned much better for my needs. The solution wasn’t a specially designed studio. It was our dining room!
And it wasn’t exactly hidden away. The dining room was right at the front entrance, meaning anyone walking into our home could immediately see my creative workspace. Depending on what I was working on, that might mean a beautiful finished project—or an assortment of supplies, tools, and half-completed creations!
Was it ideal? Not necessarily. But it worked.
I had a dedicated work surface, room for my supplies, and the ability to leave projects out without having to pack everything away at the end of each creative session. That convenience made a tremendous difference.
I learned that a room doesn’t have to serve its traditional purpose if another use makes more sense for your family. Our dining room was far more valuable to me as a working art studio than as a space reserved for occasional meals.
Sometimes the best creative solution is simply rethinking how you use the space you already have.
Building My Current Studio a Little at a Time
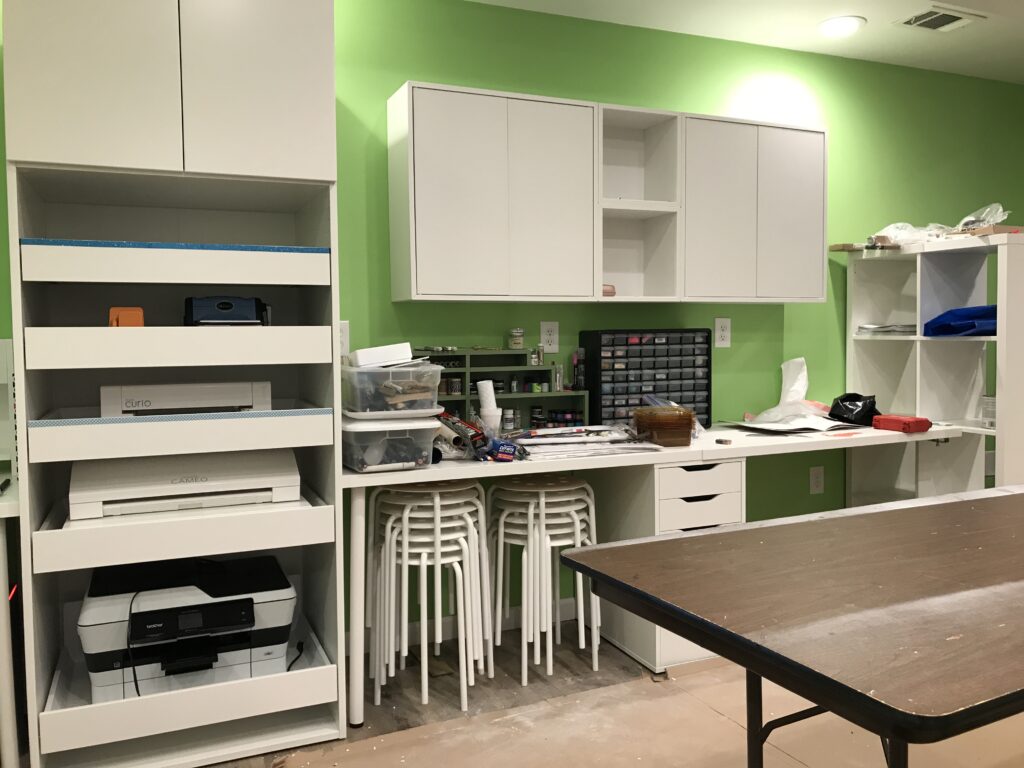
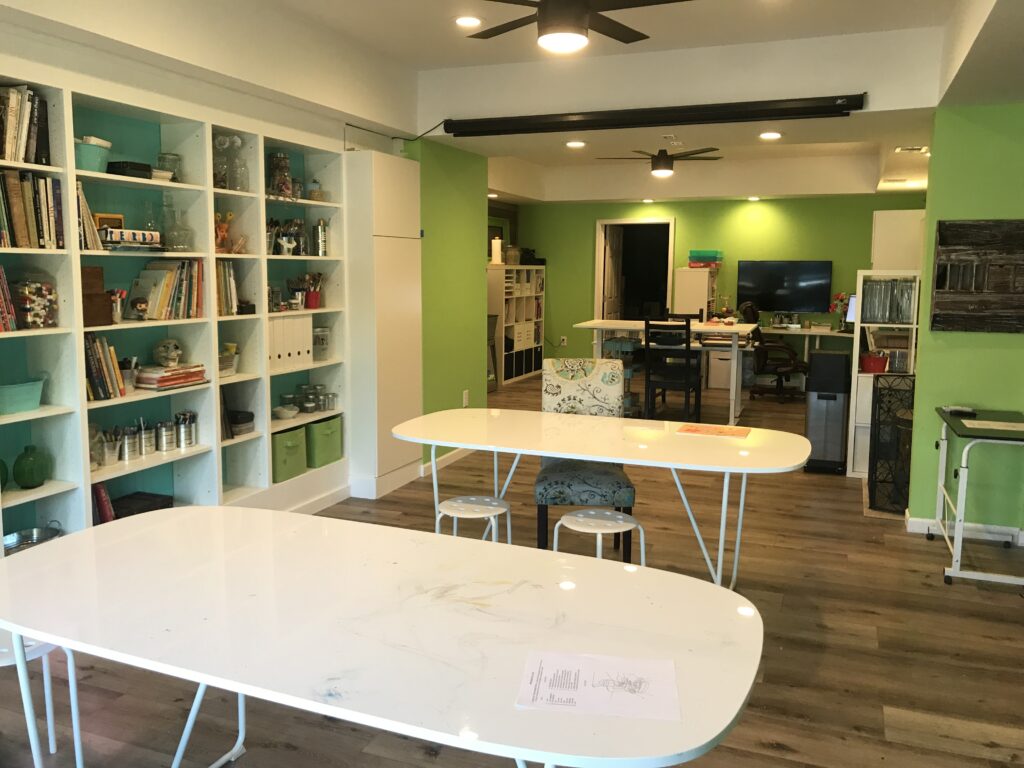
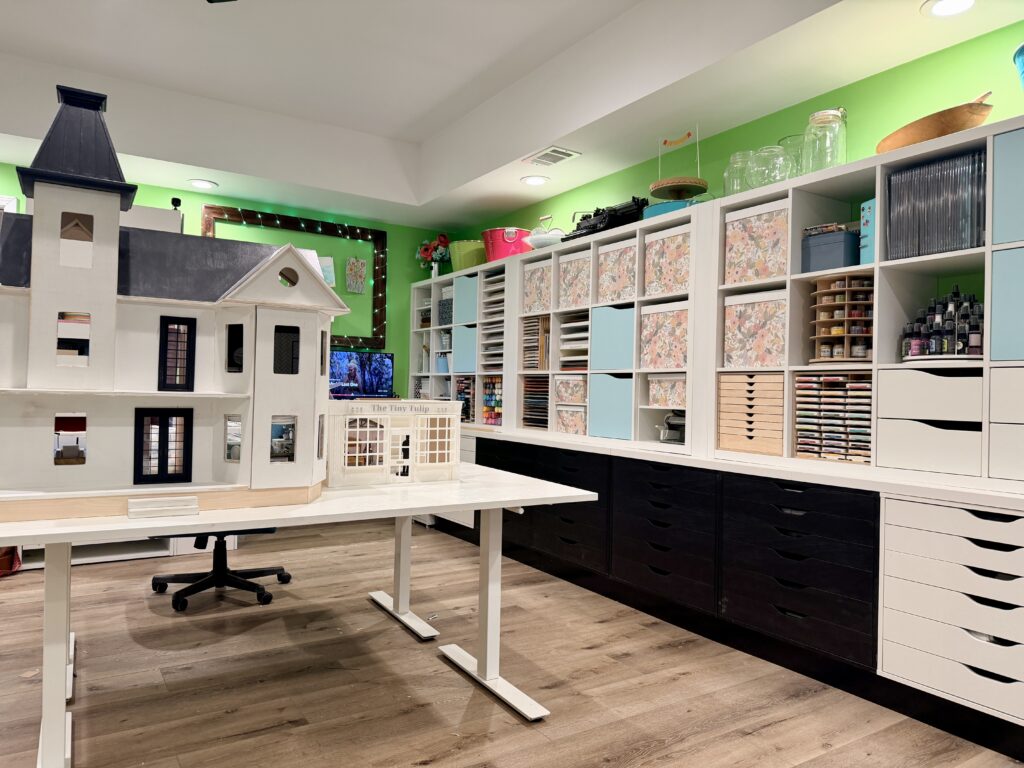
When we moved into our current home, I had the opportunity to create a more dedicated art studio. It’s been wonderful having a space specifically for my creative work, but even this studio didn’t appear fully furnished and organized overnight.
Much of my storage has been collected over the years. I’m still using IKEA shelving that I purchased fifteen years ago, pieces added about ten years ago, and newer shelving that’s only eight months old. My studio is quite literally a collection of storage solutions gathered during different stages of my creative life.
As my interests have changed, so has the room. I’ve moved furniture, rearranged supplies, added storage, and adjusted work areas to accommodate different projects and equipment. Some arrangements worked beautifully, while others needed to be reconsidered.
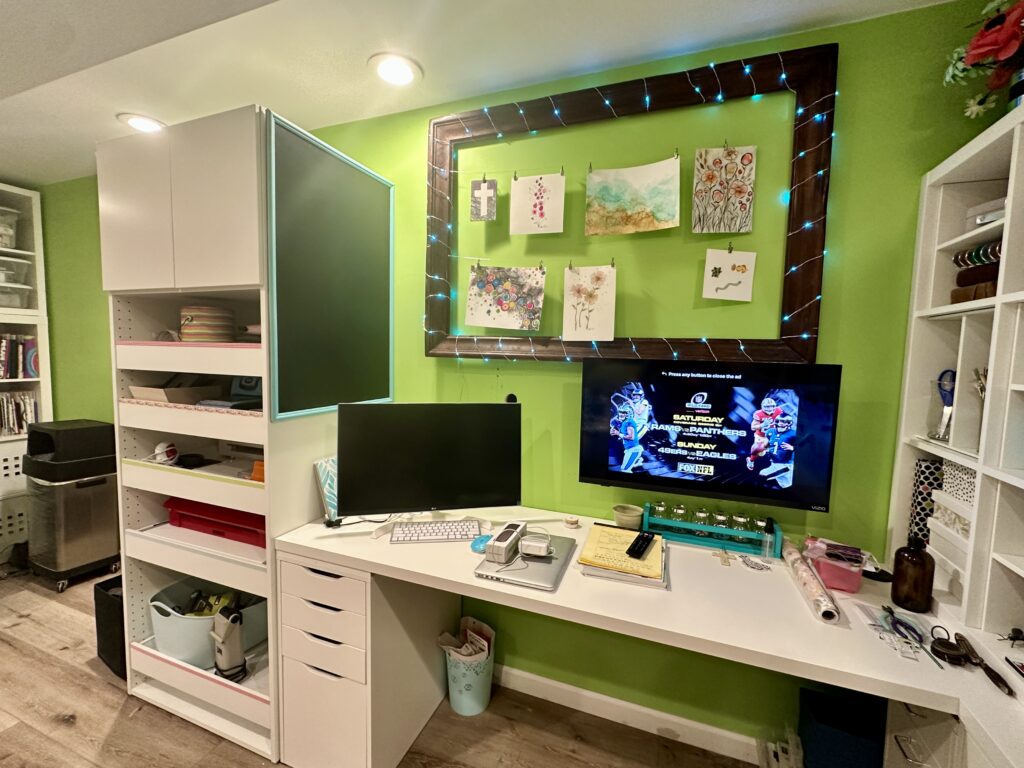
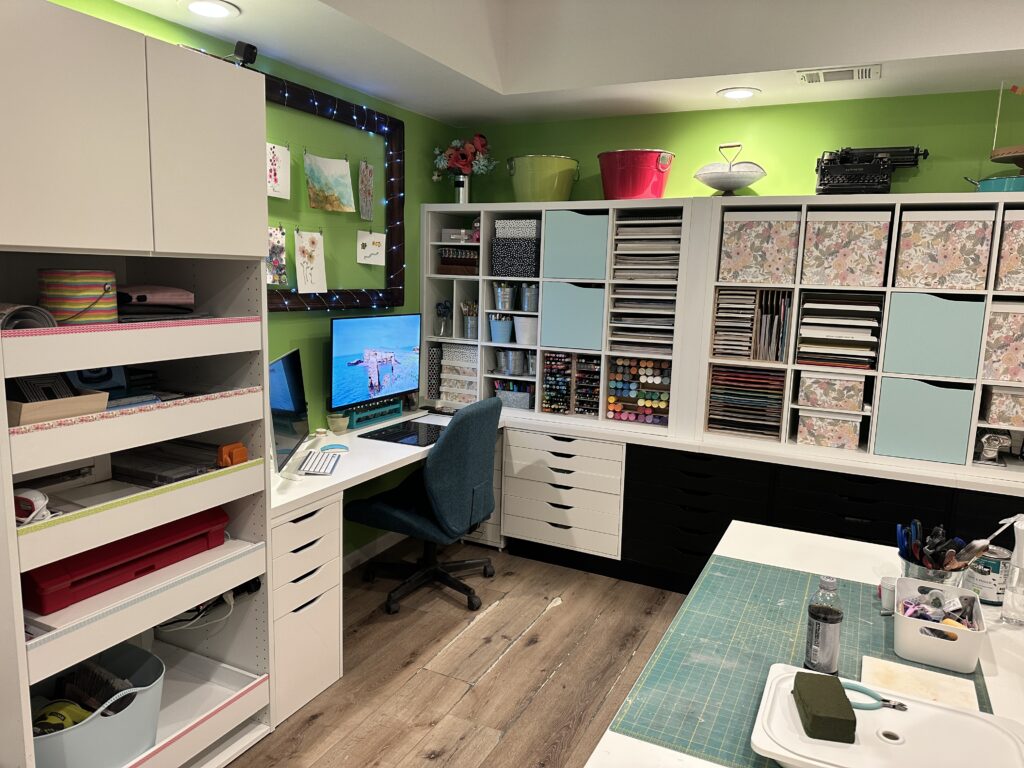
That’s one of the reasons I enjoy looking at older photographs of my studio. They remind me that the room has been evolving for years, just as my creative interests have evolved.
And perhaps most importantly, they remind me that you don’t need to purchase everything at once.
A functional creative space can grow gradually. Sometimes that means investing in a piece of shelving when the budget allows. Other times it means repurposing furniture, reorganizing what you already own, or finding a more efficient way to store your supplies.
The goal isn’t to create a perfect studio in a weekend. It’s to build a space that supports the things you love to make.
Learning to Live with the Creative Mess
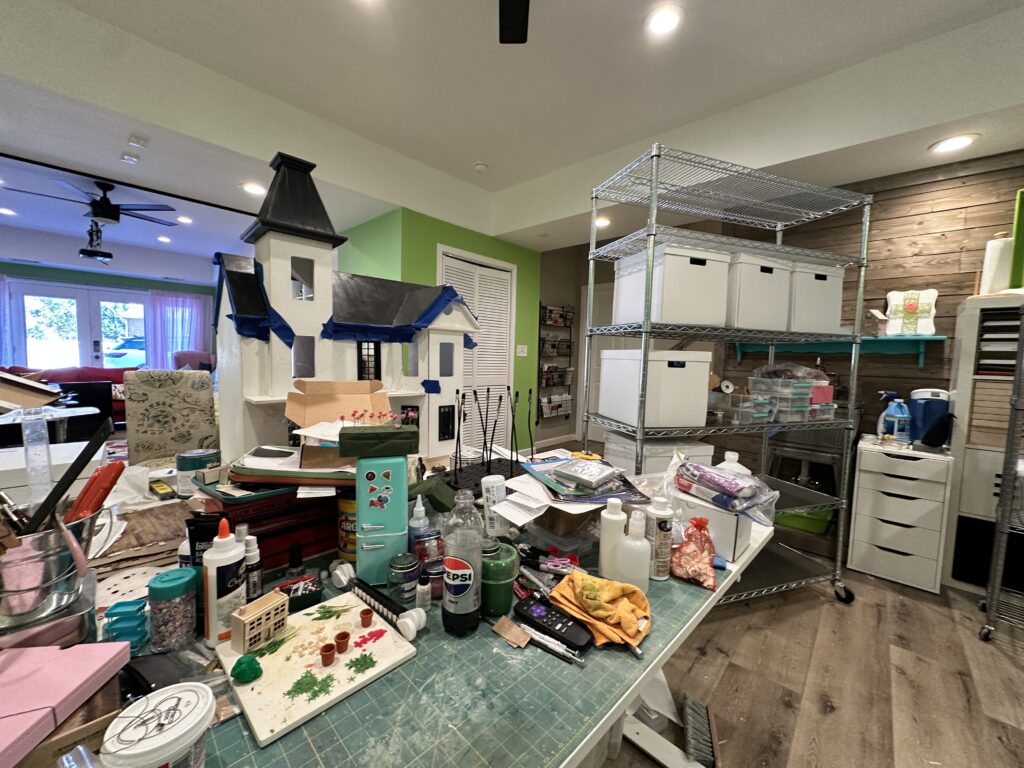
One of the most important things I’ve learned is that there’s a difference between a creative mess and a mess that keeps you from creating.
Creative projects are messy by nature. Supplies get spread out, scraps accumulate, tools migrate across the table, and unfinished projects have a way of claiming every available surface. That’s simply part of the process, and I’ve learned to accept it.
But I’ve also experienced what happens when the mess grows so large that the thought of dealing with it becomes overwhelming. Instead of feeling inspired when you enter the room, you see an enormous organizing project that you don’t have the time or energy to tackle.
Eventually, I learned to break those overwhelming tasks into smaller, manageable pieces. Instead of deciding I needed to organize my entire studio, I could focus on one drawer, one shelf, one collection of supplies, or simply clearing enough workspace to begin a new project.
Sometimes that’s all it takes to get moving again.
I’ve also learned that a studio doesn’t have to look perfect to be functional. A room where actual creating happens will occasionally be messy, and that’s okay. The important thing is finding a balance that allows you to enjoy your creative work without being overwhelmed by the supplies that make it possible.
💡 GoAlongs Creative Tip: If your creative space feels overwhelming, start small. Organize one drawer, clear one corner of your worktable, or sort one container of supplies. You don’t need a complete studio makeover to make room for creativity.
Your Creative Space Doesn’t Have to Be Perfect
It’s easy to look at beautiful craft rooms and art studios online and feel like your own space doesn’t measure up. There are some absolutely gorgeous creative rooms out there, filled with coordinated furniture, perfectly arranged supplies, and storage systems that look like they belong in a magazine.
I enjoy looking at those spaces, too! But I’ve also spent enough years creating in real homes, with real families and real responsibilities, to know that the perfect-looking studio isn’t necessarily the most useful one.
A beautiful room doesn’t automatically make you more creative, and a messy table doesn’t mean you aren’t organized or productive.
What matters is whether your space works for you.
Maybe that’s an entire room with dedicated workstations and storage. Maybe it’s a desk tucked into the corner of a bedroom, a rolling cart that can be moved when needed, or a collection of supplies stored in bins until you have time to work.
There’s no single right answer, and your answer may change many times throughout your life.
Another Studio Adventure Is Coming!
And now, after years of creating in my current studio, I’m getting ready for another change.
We’re planning a move, which means I’ll eventually be setting up an entirely new creative space. I’m already thinking about what I’ve learned from my previous studios, which features I want to keep, and what I might do differently this time.
There will be decisions about furniture, storage, work surfaces, equipment, lighting, and how to make the space function for the projects I enjoy. I’m sure some ideas will work beautifully, and others will need adjusting along the way.
And I thought it might be fun to share that process here on GoAlongs!
From planning the new space to organizing supplies, setting up work areas, and figuring out what works best, there will be plenty of opportunities to experiment and learn. Hopefully, some of those ideas will be useful whether you’re setting up an entire studio or simply trying to carve out a creative corner in your home.
So, Where Do You Create?
Whether you have a dedicated studio, a dining room filled with supplies, or a kitchen table that gets cleared off every evening, I hope you’ll remember that your creative space doesn’t have to be perfect to be worthwhile.
I’ve worked in all sorts of spaces over the years, and some of my favorite projects were created long before I had a proper art studio.
The important thing is finding a way to make room for creativity in the life you’re living right now.
Because sometimes the best creative space isn’t the one you’ve been dreaming about. It’s the one that lets you sit down, pull out your supplies, and actually make something.
Happy creating!